Showing posts with label baking. Show all posts

Saturday, April 21, 2012

Thrifty Thursday #4: Scratch Recipes & Homemade Snack Bags

Hey Friends! Having a good week? I've been working on getting caught up with house work in the mornings, and relaxing with the kids in the afternoon. Unfortunately I'm in pain again, and I'm completely caught off guard. I'm taking the day "off" today, but will get back to work tomorrow.

So, last week I presented some recipes and sort-of challenge to bake and make from scratch. Since then I've been searching on line to find a homemade alternative to Bisquick. There are some recipes that I really like that used it, but I don't want to buy it. This is one of the few things that I've missed from my pared down grocery list! I found some recipes, but I haven't made any yet. The one recipe I trust most is from King Arthur flour. My biggest hesitation is that it calls for shortening, which I really don't want to use anymore. I have about half a can of butter flavored Crisco that once it is gone, will not be replaced. I've only been using it to grease my baking pans. I'm thinking of substituing the shortening with coconut oil. Any other suggestions are very welcome!
King Arthur Quick Mix

Alright, on to some of my recipes. Most of my recipes are from an old copy of the Betty Crocker Cook Book that my mother in law gave to me. My Mom has a copy of this, as well, and was the cook book that we always used when I was growing up.  It's the first one I go to when llokng for a recipe. I've just tweaked many of them to my specifications!

~Basic Sweet Muffin~
1 egg
1/2 C. milk
1/4 C. oil
1/2 C. sugar
2 tsp. baking powder
1 1/2 C. flour
1/2 tsp. salt

Beat egg, then mix milk and oil. Add dry ingredients and mix until just blended. Bake at 400* for 15 minutes. This makes 1 dozen standard size muffins.
I use only about 1/8 C. of olive oil and use 1/8 C. of unsweetened appla sauce. I also add 1 tsp. of vanilla. You can substitute 1/2 C. of all purpose flour for whole wheat flour. I usaully add chocolate chips for the kiddos. If you add about another 2-3 Tbsp. of milk, chocolate chips and pour the batter into a greased 8x8 square pan for chocolate chip bread. Bake at 350* until a toothpick come out clean from the center, about 25-30 minutes. Double the recipe and bake it in a 13x9 pan for a weeks worth of breakfasts!


~Golden Layer Cake~
2 1/4 C. flour
1 1/2 C. sugar
3 tsp. baking powder
1 tsp. salt
1/2 shortening**
1C. milk
1 1/2 tsp. vanilla
2 eggs

Pre-heat oven at 350*. Grease pans. Measure ingredients into a large mixing bowl. Blend for 30 seconds on low, scraping bowl constantly. Beat for 3 minutes on high , scraping occasionally. Bake until toothpick comes out clean in the middle. Makes a 13x9 cake or 2 8"/9" layers.
**recipe calls for shortening, but I felt it was too dry and I don't want to use Crisco anymore, so I use olive oil. The cake is wonderfully moist now!
~I have a child that will only eat chocolate cake, but loves cinnamon. I added about 1 tsp. of cinnamon to the batter, and he loves it! If you don't have ingrdients for frosting (like me this past Wednesday!) add chocolate chips to make a snack cake. Very yummy!


~Black Midnight Cake~
2 1/4C. flour
1 2/3 C. sugar
2/3 C. unsweetened cocoa powder
1 1/4 tsp. baking soda
1 tsp. salt
1/4 tsp. baking powder
1 1/4 C. water
3/4 C. shortening**
2 eggs
1 tsp. vanilla

see instructions for Golden Layer cake above.


I have not tried to substitute unsweetened applesauce for the shortening/oil yet. I did try to substitute some of the flour in the Black Midnight cake with whole wheat flour with dissapointing results, but it was before I started using olive oil. I just haven't had the nerve to try again! I hope you try out these recipes. If you do, let me know, I'd love to hear how they worked for you!

And now, something I've been so excited to show you! Say hello to my reusable snack bags!!!!
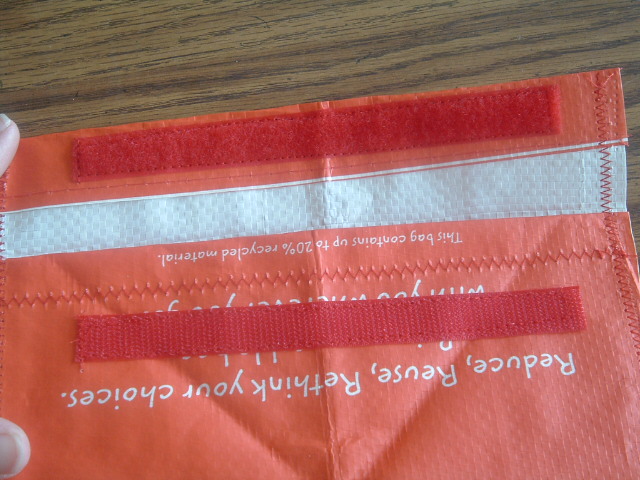
Three large, two medium and four small snack bags.

I used sew-on velcro for the large and medium sized bags. These will hold pretzelsor crakcers.

I used sticky backed Velcro on the small snack bags, which are lined. These are for cookies/cookie bars.

 
From just one 99cents reusable shopping bag, I made 9 reusable snack bags for my Dear Hubby and kiddos to use for their lunches! How cool and thrifty is that?!?!? I got the wonderful idea from, of course, Pinterest. There were lots of pins of cloth snack bags using ripstop nylon, but I didn't really want have to search or pay for it. And then I found a pin using reusable shopping bags. I will go into detail on how to make these in a future post. But they are super easy to make.
 
Well, that's all for this week! Hope you hve a lovely rest of your day.
Blessings,
Kelly

Thursday, April 12, 2012

Thrifty Thursday #3: Scratch That Off Your List!


Could you tell I was working hard on that title?

Hello, Friends! I know it's been a while, but, as usual, I've just been too plumb busy or tuckered out to compose a coherent post. Believe me, it's better that way. I ramble enough as it is with out me rushing or being semi-conscious during blogging!

So, it is another Thrifty Thursday, and today I'm getting out from behind the sewing machine and into the kitchen. One of the best (and tastiest!) ways to save money is to make your own baked goods from scratch. This is also the healthiest way to enjoy your cakes, cookies, muffins and other treats. Now, I know that for somethings, it may seem cheaper to buy some items ready made, or even from a mix. In the long run, though, I think that once you get into the habit of making things from scratch everything will even out. And you might find that you can give up some things because you have replaced it with something homemade.

Now, if you have been reading my blog for a length of time, you know that I bake just about every Saturday. Sometimes I only get to make the kiddo's breakfast item and snack item, but that is a huge help. I like to do a majority of my baking on one day because I do not like firing up the oven for only one thing. This way I can run my oven all at once and bake more than one thing at a time. This saves money by conserving electricity.

I think I'm going to revert to my bullet structure here, cause I can sense some rambling and backing up in the near future!

  • Baking from scratch saves money because you are buying 1 ingredient with multiple uses. Yes, you may be able to buy a chocolate cake mix for around a $1 a box, but if you buy a can of baking cocoa for about $2.75 you can make a chocolate cake, chocolate zucchini bread, hot chocolate (made with actual milk, not boiling water!) and chocolate syrup for ice cream or chocolate milk. Talk about more bang for your buck!
  • Baking from scratch gives you more versatility and can be adjusted to your family's preferences. You could buy a loaf of bread for sandwhiches and then a bag of rolls for dinner. But if you make a batch of bread dough, you can have both!  Or, maybe Timmy likes plain chocolate chip cookies but Betty Sue like walnuts in hers. You can make one batch of cookie dough and split it in half for them both to take to school with their lunches.
  • Baking from scratch is healthier. YOU control what you put into your food. You can add whole wheat flour to your cookies, substitute some of your butter or oil with unsweetened applesauce, and eliminate corn syrup, food dyes, additives and preservatives.
Now, I could go on. (And you know how I can go on!) But I have the feeling that you can all get my point. If you are not use to baking and don't have baking materials, or you really want to embrace making more things from scratch, you may need to invest in some things. You will find that investing is and will be a recurring theme in these posts. You may cringe at the price of a rolling pin, but that is really a one time purchase, whereas refrigerated ready made pie crusts are only good for one or two pies. That rolling pin will make you pies for practically your entire life time, and maybe even your daughter's lifetime. That is an investment worth making and money well spent!

Before I get to the recipes, I would like to tell you about some of the items I have in my kitchen that I find invaluable to have. I am by no means Julia Child or the Cake Boss, so don't feel that you have to have them, or even agree with me! And by all means, if you have something you would like to share, I'd love to know about it!
  • Large Pyrex mixing bowls: I have 2 large and one really big one. And every Saturday all 3 of them get used at least once, if not more! I like Pyrex (or Anchor Hocking) because they are sturdy, easy to clean, and you can mix and bake in them.
  • standard size muffin pan: good for (obviously!) muffins, cupcakes, mini meat loafs, stuffin' muffins and cloverleaf yeast rolls. My pan has a dozen cavities, so my basic muffin recipe can be made in one batch.
  • 2 to 3 bread loaf pans: or even more! I like to make quick breads and yeast breads, and if you are inclined to make homemade bread for your family's weekly supply, it is a very sound investment. And they can stack together so that they don't take up much space.
  • a 13x9 oblong pan: I have 2 Pyrex, and 3 metal ones. And I have used each and every one on certain Saturdays. I make the kiddo's breakfast cookies, cakes, casseroles and brownies in them. And all but one of the Pyrex pans have lids, so I can store in them as well. Now, this may be a lot for some people, but I also make snack for our church refreshments on a regular basis, as well as making birthday cakes for my DH and children. I can make the cake for our family party, the children's friends party and the goody to bring in to school to share for a treat. These pans to not sit in the cupboard in neglect!
  • a glass 4 cup measuring cup: This, too, is a recent purchase. I wondered if I really would use it as I stood looking over the Pyrex/Anchor Hocking shelves at my local Kmart, $1 off coupon in hand. But, like the sheet pans, I do. I use it for measuring and mixing my wet ingredients for homemade bread and other recipes. And I have even used it for the DH's and mine scrambled eggs.
  • a glass 8 cup (2 qt.) measuring cup: I have a Tupperware version of this that I used for about 7 years before I started to become a bit leery at the thought of there being Tupperware scrapings in my muffins, pancakes and waffles. Then I purchased an Anchor Hocking one and gave the Tupperware one to Hubby for a sap dipper. This is the perfect size for a batch of muffins, chocolate chip bread, or homemade waffles. It is also used for pouring off the juices of a turkey or when straining homemade stock.
  • rubber or silicone spatulas: I have 4 of these. One is a very large one from Tupperware that I use for mixing up snack mix, granola or sauteing with. It doesn't really get the job done when it comes to scraping the sides of mixing bowls, so that is where 2 others come in. And then there is the double ended one that is more narrow for scooping out of jars with. You will never waste a drop when using one of these, and scraping the bowl clean is handy when it's time for clean up.
I'm pretty sure I'm missing a dozen things, but those can be for another post. It's time to get onto the fun part: recipes! I have posted these recipes before, so I will only be adding the links, but I'll be giving some hints and tips for each. And as I'm writing this, I'm thinking that this is going to be part one of a series because I have so many more basic recipes to share!

Boynton Breakfast Cookie Bars I make these just about every week for my kiddos! You can add what ever stir-ins that you and your family like. These have replaced the white bread toast and cheerios that the kids used to eat for about 2 1/2 years now. I would really like to figure out how to soak the oatmeal for this recipe, but just haven't had the time to experiment. If I figure it out, I'll be letting you know!
Chocolate Zucchini Bread While going over this post, I realized that I didn't include the sugar!! I feel like such a big goober. If you tried to make this, I SOOOO apologize! The sugar is now included in the recipe. Another note on this is that I no longer use canola or vegetable oil, I use olive oil. This is great for a snack or for breakfast. It's yummy with cream cheese, too! I use my food processor to shred the zukes, and take out the big seeds. I'm going to have to make a batch of this Saturday, I froze shredded zucchini for this purpose!
Whole Grain Chocolate Chip Cookies I make these every week for the kids to put in their lunch boxes. I have taken to making these in the sheet cake pan and substituting 1/2 to 1/3 cup of the butter to unsweetened applesauce. I also do not use margarine or shortening any more. You could use coconut oil in place of butter, too. This recipe is really just your basic chocolate chip cookie recipe that I tweaked. If you don't have oat and wheat flour, you can use all purpose flour. By using the sheet cake pan I can save time and I have enough for the entire week for both the kids and my DH. (O.k., o.k., and I can filch a couple for myself!) They also seem to stay more moist in bar form, too.

Well, I was going to post a couple more recipes, but this has been long enough! Have a wonderful rest of your Thursday.
Blessings,
Kelly

Wednesday, February 8, 2012

Flock Block Take 2 and A Craft

Sweet chicken ecstasy- nothing but feathers and dirt when the girls and
James get down and dirty taking dust baths! I felt almost like a Peeping
Thomasina!
Remember my homemade flock block? Well, the temperature dipped down last night, so I figured the JIC's (Jerks in The Coop) would be holed up in the coop today. I do NOT want any more boarders in the basement, so last night I made another flock block. This time I had a lovely assistant.
I don't know why the picture is blurry. Hope no one has motion
sickness that views this!
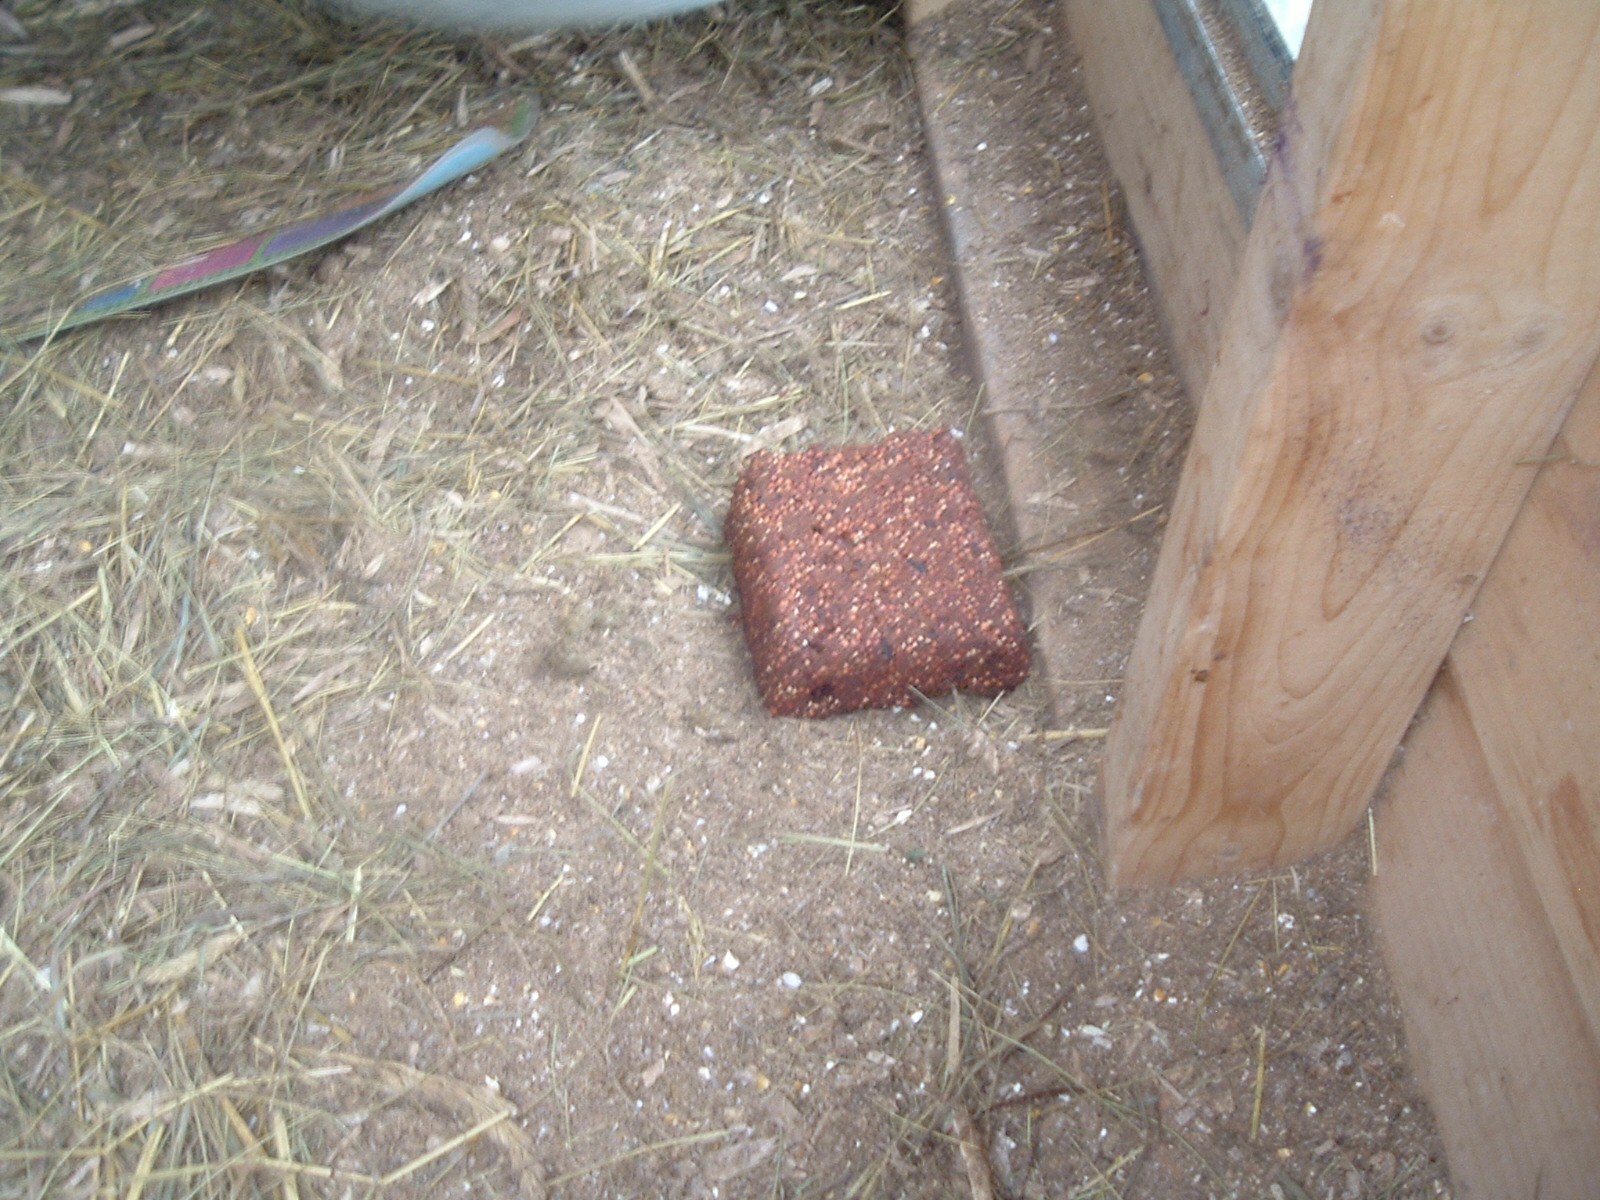
When making the flock block this time, I didn't add any apple, and I used 3 whole eggs. I think the addition of 2 more eggs helped in holding it together better. I also put all of the recipe into just one loaf pan. It baked at 200* for about an hour, then turned the temp up to 300* for about another 2 hours. I took it out and let it cool on a wrack. I tried to get it out of the pan and learned a valuable lesson: use Crisco or butter to grease the pan, not just canola oil. Last time they came right out of the pans. This time my Darling Hubby got it out of the pan after I had given up. (I just love that man!) the block sat out over night to dry out a little bit more.

Flock block baking right along while our waffles and bacon stay warm
for dinner. Told you I hate to run the oven for just one thing!
My DH put the block out in the coop this morning. When I checked on the chickees after lunch, only a little corner was pecked at. {sigh} No one looked injured, so that's good.

Earlier this afternoon I took a break from housework and culinary efforts for the animals to make a Valentine's Day craft. I don't have very many Valentine's decorations because I'm rather fussy. It's been hard to find decorations that go with my country decor and that I'm willing to shell money out for. So I looked on Tipnut.com's Valentine's Day page for inspiration. While perusing the pages, I thought of my own craft to make that would be cheap and easy to make. Here it is:
Finished product! Whaddya think?
It was soooo easy, and only took a little bit of time. What took the longest was getting just the right heart shape for templates. I used scrap paper to make my templates, but you could use a manila folder or card stock. I plan on making more of these in the future. Here is what you need:

I wasn't sure which buttons to use!!
2 sheets of felt
4 heart templates in small, medium, large and extra large
hot glue gun
marker for tracing
2 fabric scraps
twine or ribbon
decorative buttons or other doo-dads
scissors (you could use pinking shears for an even fancier look- I was too lazy to dig for mine!)

Here is what to cut: 1 small heart, 2 medium hearts, 2 large hearts and 1 extra large heart
I cut my hearts out free form, but if you want them to all be alike, you could find a template and increase or decrease the size using a scanner and printer. When I went to cut them out, I folded the felt in half and traced the template with a marker.
Then I laid out my hearts and used a glue gun to glue them together. I flipped over the hearts and spaced them out to where I wanted them. Next, I took a length of twine twice as long as I wanted it to be and made a knot at the top to hang this from. Using the glue gun, I attached the twine to all three sets of hearts.
I took the 2 scraps of homespun fabric and tied a single knot in the middle of each. I then glued these between the hearts. After letting the glue cool and dry I flipped everything over. Play time! I took out different buttons and trims to find the perfect look. Here's what I selected for the top and bottom hearts:
Chickee buttons of course!!!!! I just couldn't resist ;0)
This would be a really great craft for kids. If younger kiddos are making these, you could use good ol' Elmer's glue, though it would take longer for things to dry. I'm thinking you can do lots of different shapes for the holidays, or even for year round.

Well, I'm one tired and sore Mama with a busy day tomorrow. Have a lovely evening, Friends!
Blessings,
Kelly

Thursday, February 2, 2012

[The] Baking Is For the Birds


Now, I realize that some of you are going to think I'm off my rocker. I can't say as though I blame you. I've been doing all sorts of weird things with food lately, (like using them in the bathroom!) but now I am baking for my chickens. {insert eye roll here} This endeavour in the kitchen is not a labor of love, but of necessity.

See that hen up there in the picture. Let me introduce you to Bigfoot. (We have monster truck fans in the house!) Bigfoot and 3 of her flock mates have recently taken up residence in our basement. It seems as though the rest of the flock (that we not-so-lovingly refer to as "the jerks in the coop") were bored during our last cold snap, and decided to peck at some of those lower in the pecking order. We lost 1 hen to this horrible behaviour. My DH had gone out to the coop one evening to check their food and water, and discovered our dead hen. She was laying half in/half out of a nesting box. We had no idea how she had died (at that moment anyway) but she had been pecked. Whether this had occurred before or after the time of death, we were unsure of. (In case you are wondering, we are currently thinking of opening our own Chicken Scene Investigation practice. Kidding! :0) We chalked it up to the inevitable fact that livestock die, and moved on.

The following week I was alarmed to have Teddy Bear come screaming into the house that he saw "meat" on one of the chickens and he was very upset. I ran out to investigate, and discover not 1, but 2 very injured hens. So we set up chicken triage quarters in the basement and have been making the jerks in the coop go out in the run every day. We still ended up with yet another injured girl, but fortunately my DH discovered her early.

I did quite a bit of research on line about why chickens turn to this disgusting behaviour, and there are many. I'm pretty sure that the answer to our riddle is quite simply boredom of being cooped up. (No pun intended) So I looked for suggestions to help this. Most of the articles I read suggested offering the chickens something else to peck, rather than their fellow flock mates. I remembered seeing a Purina Flock Block at our local Tractor Supply Company, and thought that that would be a great idea for the chickens. But it would be a very bad idea for our budget! So I went about finding a recipe for a homemade "flock block". It was not easy, I really had to sift through a lot of links that the search engines brought up, but I finally found 2 different links, both on message forums. Here they are: Alberta Chickens you will have to scroll down a bit to find the recipe. Backyard Chickens I've read quite a few of the other pages from these links and found many other good ideas, and some really bad ones (like the one where a neighbor suggested giving them Styrofoam to peck at or putting Vick's Vaporub on the injured birds.)

This is what I did to make my own "flock block".


And here is my recipe:
2 C. oatmeal
4 C. birdseed
1 C. cornmeal
1/4 C. olive oil
3/4 C. molasses
1/4 C. water
1/2 C, honey
1 small apple, chopped
1 egg, shell crushed and added as well

I mixed the dry ingredients well in a large bowl.

Then I added the wet ingredients, and the apple. I also added half of a peanut butter sandwich that my middle child did not eat at school yesterday for his lunch.
Using a rubber spatula I spread and packed the mix into 2 very well greased loaf pans. (I used Crisco, but lard would be a good choice, too, if you have it.)

I used a bamboo skewer to make a hole for hanging before I put these in a 300* oven for an hour and a half. Then I turned off the oven and let them stay in there for another 30 minutes. I then removed the blocks from the pans and set them on a cooling rack. Unfortunately, one of the blocks broke in half despite my efforts to carefully tip it out of the pan.


I put the flock blocks back into the oven to dry further and left them in there until the oven was completely cool. Now it's time to give one of these to the jerks in the coop. I put an old shoelace through the hole of the block that was not broken and headed out to the coop with it. It broke in half. {sigh} So I hung up the half with the shoe string and put the other half on the floor of the coop by their feeder.
The Jerks in the Coop.
I couldn't wait around to get pictures of the chickens pecking at the block, but by the next day, it had been completely consumed! They liked it! I kept the next block for if we have another cold snap or (dare I hope!) a snow fall where the chickees would be confined in the coop again. We had snow (for all of 2 days!) earlier this week, so I put half of the second block in the coop. My DH had also built a shelf in the coop to give them some more room. These two measures seem to be helping.


I left out the sugar, salt and reduced the baking soda for the chickee's corn bread.

Above is Star, chowing down. Pictured below is Flower, who for once was quiet!
(Can you guess who named these girls? I mean, really! Star and Flower?)

And now for some more gratuitous photos of our kitty cat Merlin. She was absolutely fuming that I was making those bird brains a treat and won't even bothering to open her a can of tuna!
"Is that for me?"

"What do you mean "NO"?!!!???!!!"


Watching from the top of the basement stairs as the girls in the
basement chow down on corn bread.
"Just leave that cage door open for a minute and I'll get my own chicken treat! MWAH-HA-HA-HA!"**


*I do honestly realize that all of this pecking is a part of regular chicken behavior, as horrible as it is, and not a matter of chicken personalities!
**I really have no idea what Merlin was thinking, but I think it's a pretty safe bet that I'm pretty close!


I'm hoping this is helpful for all of my fellow chicken owners. If you don't own chickens, though, and are fond of feeding wild birds, this would be a great idea to make for them as well. Have a lovely day, Friends!

Blessings,
Kelly

Wednesday, November 23, 2011

Getting Ready for T-Day

Homemade cranberry sauce- yummy and (somewhat!) healthy!

Happy Wednesday before Thanksgiving! It's been a busy day in the kitchen, and the house smells absolutely amazing. I have 2 loaves of bread, 36 rolls, 6 individual pie crusts baked, a bowl of Watergate salad chilling in the fridge and a batch of cranberry sauce finishing up in the crock pot. I still have a cheese log to make, but that will have to wait until after our dinner of left overs.

Here's a little poem I made up for fun. I'm by no means Longfellow or Frost, but I hope you enjoy it!


'Twas the day before Thanksgiving, and all through the land
Ladies were busy with pie crust in hand.
The children were busy with their crayons and their paper,
The tables were set with fine china and tapers.
The men were all dreaming of drumsticks and touchdowns,
While women were baking and thinking of pounds.
The stores were jam packed with last minute shoppers,
And in many kitchens went mixers and choppers.
Travelers made their way home, by land and by air,
While turkeys were thawed and brined with great care.
Rolls and breads were baked with flour and yeast,
All to be eaten with the great turkey feast.
Recipes were checked and compared on the phone,
Batters were beaten and cream whipped to foam.
It was busy indeed, that Wednesday before,
And when you thought all was done, look, there was more!
Here's wishing you well, many blessings, take care!
For, before you know it, Black Friday soon will be here!

Have a wonderful day!
Blessings,
Kelly

Monday, November 21, 2011

A Birthday, Thanksgiving Plans and More

HAPPY 11TH  BIRTHDAY TEDDY BEAR!!!

Yes, it is our Teddy Bear's birthday today. Unfortunately, he's home from school with a cold. I'm not so sure if he feels that it is unfortunate or not, though, because he gets to play the video games that he got! We had a family party for him yesterday, and tomorrow after school we are going to the movies with a friend to celebrate. Tonight we will have a small cake after a spaghetti dinner and keep things low-key.

Having TB home this morning skewed my grocery shopping plans a bit, but thankfully my Mom was able to watch him so I could zip down and back quickly before it got too crazy at the stores in town. And she even (Thank you so much, Mom!!!) blessedly, washed the dishes and folded laundry for me. I can't thank the Lord enough for blessing me with such a helping and caring mother! So, now I have more time to sit down and plan for the week. The kiddos will be home from school starting on Wednesday, so I want to have some crafts, goodies and activities to do with them during the week. Also, I am making bread and rolls to bring to my sister's on Thursday. Friday I will be having my DH's family over for appetizers and desserts in the early afternoon, so I need to finalize my menu for that.

Tomorrow I will be doing the majority of the baking that needs to be done for Thanksgiving get togethers. This is what my plan looks like so far:
  • make 2 loaves of bread and a batch of rolls for my sister's on Thursday
  • make a pan of choc. chip cookie bars for Friday
  • finish the Thanksgiving lap book
  • clean the bathroom
  • get some laundry done (seems like this is always on the list!)

 
Wednesday I will have the children help me make the cranberry sauce, Watergate salad, and a batch of individual pizza crusts. We'll also work on getting the house set for Friday, and they love to make napkin rings and place cards for the table. I usually just set out crayons, stickers and index cards for them. I'll talk to them more about what they would like to make on Wednesday.

I tried to get my holiday planner sheets into PDF format so that I could post them here for you, but it didn't work. And I'm just not technically savvy, so I have no idea what to do! I haven't been able to keep up on the "Don't Wing It Wednesdays" for before Thanksgiving, but I will be keeping up for Advent and Christmas.

I have my Advent wreath pulled out for Sunday, I just need to pick up my candles for it. I'm thinking of having a cardinal theme for Christmas decorations this year (I have plenty of cardinal things already!) so I would like to find a ribbon to decorate the wreath with, too. I also need to make up my mind about how to approach the Jesse tree; do I want to make ornaments, try to find ornaments, do an actual tree or make a poster? I'll have time on the drive Saturday to think this over.

Have a lovely Monday, Friends!
Blessings,
Kelly

Monday, November 14, 2011

A Menu Plan, Lap Book and Family Faith Wall To Share

Happy Monday, dear Friends! We had a long weekend with the children being home on Friday. Princess was able to go to her friend's house to play and the boys ping-ponged between Gramma and Grampa's house and home. Saturday was the first day of rifle deer season, so my DH and I headed out to the woods to take our rifles for their yearly walk. I actually played hide n' seek with a large doe, and then had a staring contest with her before she quietly bounded away. It was right in the same spot where Teddy Bear took his shot last week! At first I couldn't see if it was a buck or doe because all I could see was a back side, so I waited patiently (and very quietly) for the deer to move from behind a tree. When the wind picked up, I slooooooooowly creeped ahead, only to discover that it was a doe. I'm thinking of heading out early Wednesday morning to the spot to see if I can find a buck there!

I've done my grocery shopping for the week already and finally got a chance to take stock of the freezer last Thursday. So that means I have a menu plan for the week! Last week I sort of winged it, and Sunday became a takeout pizza night because I was not feeling well at all and my DH had a back ache that kept him down for the count most of the afternoon. I've really got to get to work on freezing some meals for occasions such as this, as well as getting an extra batch of cookies in the freezer, too. I wasn't able to bake Saturday due to being out hunting and then yesterday there was just no way I could be up on my feet for any length of time. (I know, I sound rather whiny, don't I? Sorry!) The kiddos were not happy for having to settle for a breakfast cookieless breakfast!

~Menu for Monday Nov. 14 to Sunday Nov. 20~

~Monday: grilled baby back ribs, baked potatoes, salad, applesauce, corn and banana
~Tuesday: homemade shake n' bake chicken cutlets, stuffin' muffins, carrots, fruit
~Wednesday: Breakfast for Dinner bacon, scrambled eggs, waffles and fruit
~Thursday: turkey smoked sausage, roasted potatoes, green beans, fruit
~Friday: Baked ziti, corn, fruit
~Saturday: venison stew with carrots and potatoes
~Sunday: leftovers, veggies and fruit

A prayer for one side and Scripture verses for the other. I added some stickers to make them look prettier!


Well, I finally got my Scripture verses typed, printed and framed for our Family Faith wall, and have some seasonal decorations added as well.

And here is a peek at our Thanksgiving lap book: (It's still a work in progress!)

I covered a standard size manila file folder with wrapping paper.

I added a flap of dark red card stock.

The front. I "laminated" the title with clear packing tape, glued it to one side of the cover
 and added a hook and loop closure on the other side.

A Blessings Tree (I have to add the hook and loop pieces so that the blessing leaves can be stuck on)
 and a print out of Bible verses.

A pocket for the mini books and Bible memory verse cards.

*I keep forgetting to mention a wonderful resource for families, and one that I used for the lap book. Scripture Adventures make wonderful holiday resources filled with recipes, crafts and Scripture. We have both the Easter and the Thanksgiving ones. I think I'll be ordering the Christmas one as well. The best part is that you print it out from your computer, so you don't have to wait for it to be delivered. Just make sure you have plenty of paper and ink!

Well, that's all for now! Have a wonderful day.
Blessings,
Kelly


*This is not a paid endorsement, just my opinion, plain and simple!

Wednesday, November 2, 2011

Introducing!!!!!

A flock of geese headed south for the colder months.
Happy November !!!!!!! As you may have read before, autumn is my FAVORITE season, but November has to be my favorite month. That love has grown as I became an adult and homeowner. There is no more lawn mowing, weeding, bugs, or gardening to do. Some lawn work to get things hunkered down for winter, but in the crisp, clear air, you can't seem to mind being out and working. You're not sweating or swatting. And Thanksgiving has always been be favorite holiday. Family, food, history and faith all rolled into one beautiful, scrumptious package!

I mentioned in Saturday's post that I had to re-do my dinner menu plan for Thursday, so here is this week's revised menu plan:

MONDAY: Sloppy Joe's and green beans
TUESDAY: Leftovers (mac & cheese, sloppy joe meat filling, chicken)
WEDNESDAY: Breakfast for Dinner- scrambled eggs, sausage, waffles, applesauce
THURSDAY: Individual homemade pizzas, salad, fruit
FRIDAY: Spaghetti, salad, peas, apple sauce
SATURDAY: Pot roast with potatoes & carrots in the crock pot, applesauce, canned mandarin oranges
SUNDAY: Left overs

I'm trying to keep Saturdays as a crock pot day, as I'm on my feet so much with baking, and we have hunting season now, too. Sunday's will start being a designated left-overs day, as I try to keep Sundays easy because of the Sabbath, and I truly need a restful day. I don't like to be legalistic about Sundays, but I like to relish the blessing and gift that it is meant to be, so very little (if any) house work, though I have been known to mow the lawn (riding mower) or putter in the garden.

And now for something I have been working on. I've had the holiday countdowns on my blog page for quite a while now, and as I explained, it's because I like to plan when it comes to the holiday season. So, I am introducing:
DON'T WING IT WEDNESDAYS

Counting today, we have 4 Wednesdays until Thanksgiving, and 7 until Christmas. So, instead of getting frantic about the holidays, lets use this time to plan, plan, plan!!!!!!!! It's been a while since I've posted about planning or planners, but if you've been a long time reader, you know how much I like to plan for the holidays. Last year I put together a Holiday Planner (Read here for an intro. to last year's planner) and found it to be VERY helpful. It organized all of my calendars, planning pages, flyers from school and church, as well as research that I have done on different traditions all in one place. I'll be updating this year's planner, and posting on it as soon as I'm done. I got most of my inspiration from one of my favorite blogs, By Sun and Candlelight. You can also check out Organized Home for more information and inspiration, as well as free printable pages you can use to make your own planner.

So this week's challenge is this:
  • Brainstorm!!!!! Think about your usual holiday traditions, what to keep, what to try.
  • Start a planner- it doesn't have to be fancy, even if it is just some notebook paper stapled together, keep your brainstorming and info together.
  • Are you putting on the Thanksgiving feast? Traveling? Get dates set.
  • Looking for crafts to do with the kids or a new recipe to try? Or wonder about why we do some of the things we do? Hop online or get to the library to do some research.
Every Wednesday will be something new to do, and I'll be posting what I'm up to. I have NO IDEA how to link up with other bloggers (If you think you can walk me through it or point me in the right direction, I'd be so grateful!) but you can share by leaving a comment, emailing me at Homespuninpirations@gmail.com or posting on my facebook page.

Have a lovely evening, friends!
Blessings,
Kelly


Saturday, October 29, 2011

Baking a Weeks Worth on Saturday Part 2

Breakfast cookies

Crusts for individual pizzas.

Chocolate chip cookies.
I honestly thought I would never get to this post! I may have bit of more than I could chew in the kitchen today, but it was well worth a sore back and feet. And I'll definitely sleep tonight!
Today I baked:
  • a batch of choc. chip/M&M cookies for the kid's and Daddy's lunches.
  • a batch of choc. chip/M&M cookies for Princess' class party on Monday
  • breakfast cookie bars
  • a batch of pizza dough that made 8 individual crusts- Wheels had one for dinner tonight, 5 will be used for dinner Thursday night
  • a batch of white bread dough that made 24 dinner rolls and a 9 inch pie plate of sticky buns for tomorrow's breakfast.
I also had a whole chicken in the crock pot for our dinner tonight. It was a pretty big bird, so I had plenty of meat left for another nights dinner. After getting all of the meat of the carcass, I pulled a quart size freezer bag of veggie scraps to add to the crock pot along with some more water, then turned the crock back up to high. (Read here to learn how Heidi over at Frantically Simple makes a crock pot veggie stock.) I'll turn it down before bed and let it cook over night. Tomorrow after church I'll strain it out and save for Tuesday when I make chicken noodle soup for my lunches.

Speaking of chicken noodle soup, I've been thinking of canning my own soup. It would save on time, money and my health if I had my own soups ready to heat for lunches or dinners. Here are some links about canning your own soups:
This past week I posted my dinner menu plan for Oct. 24 to Nov. 5. I had to change my plan for this coming Thursday because I'll be working, so I need something easy and quick. This is where those pizza crusts are coming into play! I have them on the freezer, so Thursday morning I'll just pull them out to thaw.

When I shared with my sister that I had my dinners planned for the next two weeks, she asked me how in the world I could know what I was going to have. I said it was easy, I know what is in my freezer and pantry. Keeping a stocked pantry and freezer, as well as knowing what they contain is key to planning your meals. Here are some helpful links for keeping a pantry and menu planning:
Well, I hope this was helpful! It's 8 p.m. right now, and I am one tired Mama. Have a blessed Sunday.
Blessings,
Kelly

Monday, October 17, 2011

What I've Been Up To


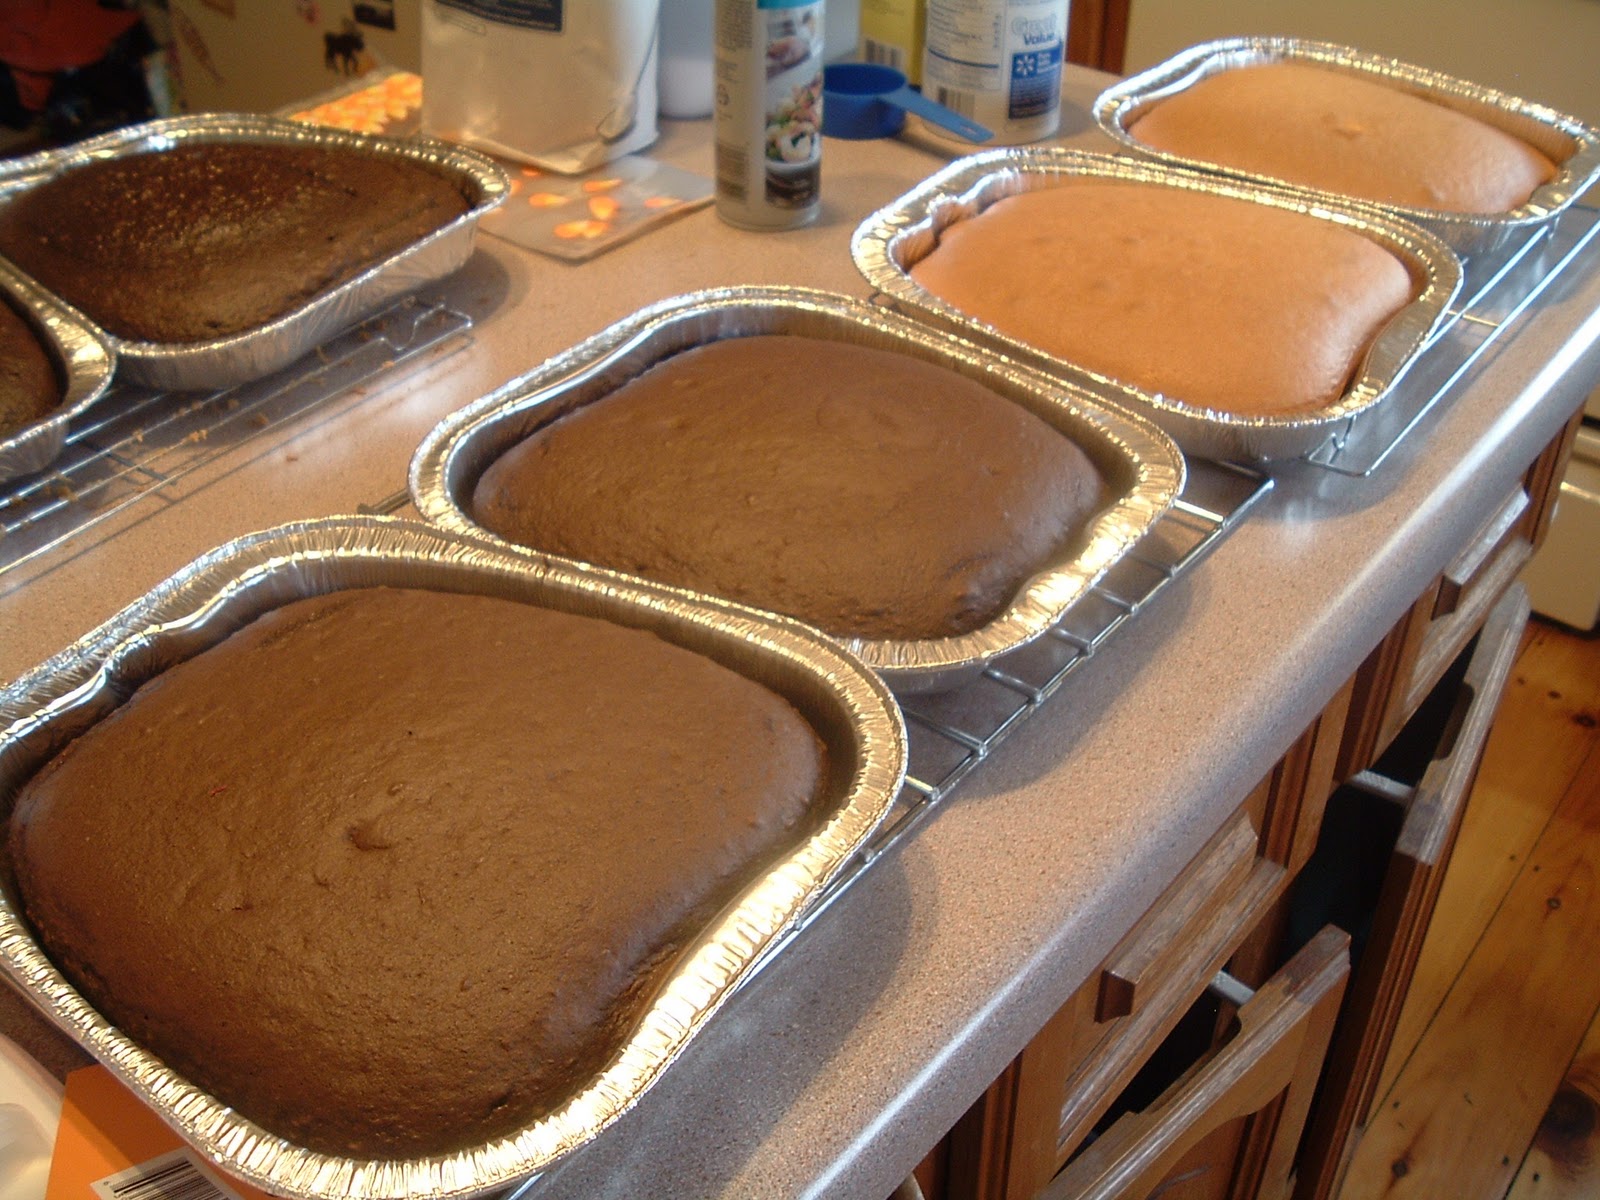
Hi Friends! It's been a while since I've been able to write a post, although I have been able to read some of my favorite blogs while taking a break. As you can see from the photos above, I was very productive in the kitchen! My mother and I shared a table at one of the local craft fairs, and I decided to do baked goods this year. In all, I had 4 cakes, 9 dozen cookies, 18 mini loaves and 3 regular to sell. The bad news is I came home with almost everything minus only a couple mini loaves and a dozen cookies. The good news is the freezer is filled with baked goods, and I was able to share, as well.  I may have only made enough to cover the cost of the table, but I now have readily available snacks, goodies to offer unexpected company, and gifts. It was well worth the 2 days of baking!

Last Thursday I had a Four Wind's work shop, where I learned about beavers and muskrats. It's amazing how wonderful and unique each of God's creatures is! The children don't have school on Friday, so I think we might expand on our beaver/muskrat knowledge and make a fun "beaver lodge" out of chocolate "mud" and pretzel sticks. I'm trying to think of some likely places to find either animals (or at least signs of them) to go on for a "field trip".


Speaking of field trips, Saturday afternoon we went to an open house put on by a local Omya quarry. This is an annual event that we have gone to for about 4 or 5 years now. We always enjoy it, and learn something new. The kids, (mostly the boys!) love to see the huge loaders and dump trucks that work in the quarry. After donning a hard hat, you can get on a school bus and go down into the quarry. This year I opted out of this part, as school bus seats and my herniated disc just do not get along! I did get to see a double rainbow though! The kids came back to the van with bags of rocks that they had hacked away at with hammers. Next spring they'll join their brothers and sisters out in the flower garden. (the rocks, not the kids!!)

So that's what I've been doing. I'm hoping to get some more posts this week, as I have to more to share about using oatmeal and getting the home and garden ready for winter. Have a wonderful day!
Blessings,
Kelly